This article describes how to setup the “Remote Desktop Services” – in the past also known as Terminal Services – on Windows 7 using the Microsoft Management Console.
First you need to install the following package:
Remote Server Administration Tools for Windows 7 with Service Pack 1 (SP1)
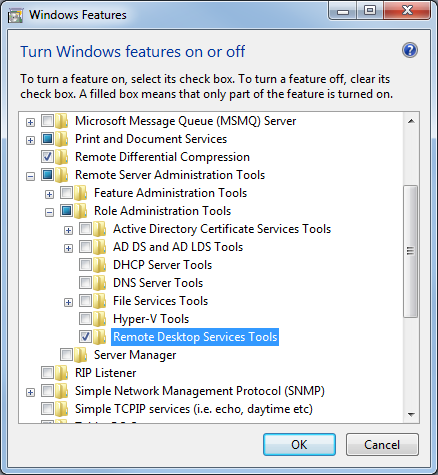
After installation, navigate to “Control Panel”-“Program and Features” and click on “Turn Windows features on or off”.
Enable “Remote Desktop Services Tools” under “Remote Server Administration Tools”-“Role Administration Tools”.

Now you can access the Remote Desktop service through the Microsoft Management Console.
The Microsoft Management Console can be accessed by executing “mmc” in the “Start”-“Run” window.
Go to “File-Add/Remove Snap-in” and Add the “Remote Desktops” snap-in. Now save your MMC configuration settings to the Desktop or any other easy accessible location and your are set.
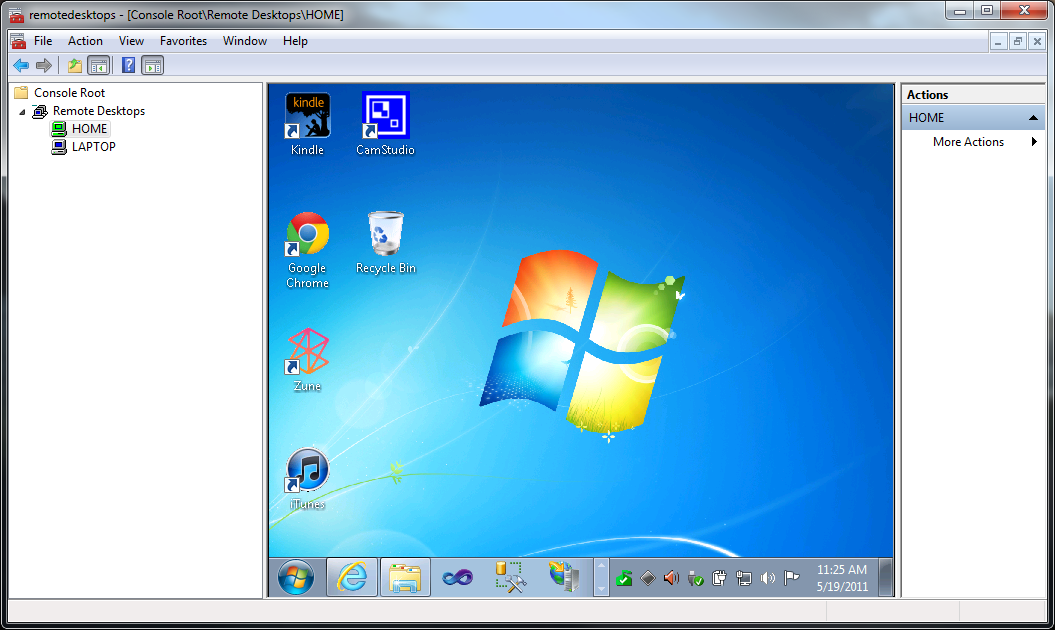
You can add as many Remote desktops as you want:

My experience is that you can get the most out of it by saving your credentials for each connection. This way you can easily connect with each machine and make switching from one machine to another look seamlessly easy and smooth, even when you didn’t log-in yet.
On certain machines saving of credentials is forbidden. You can change this by editing the Group Policies.
Start the Group Policy Editor by running “gpedit.msc”.
Navigate to “Computer Configuration”-“Administrative Templates”-“System”-“Credentials Delegation” and open “Allow Saved Credentials with NTLM-only Server Authentication”.
Enable the policy and click on the Show button to add the machines you want to enable saving of credentials for.
‘TERMSRV/*’ will allow it for any machine (through terminal services). But you can also specify a specific domain, for instance ‘TERMSRV/*.mydomain.com’.
Close the screens by clicking “Ok” and you are done!
Happy remote administrating!
Thanks to Alin Constantin for his blog post on how to enable saving of credentials for terminal services.